Wednesday, February 18, 2015

Gentlemen's Parlor Before and After

The outside wall had a little more damage. Under the right window there was a little moisture damage. The last layer of wallpaper was a modern vinyl coated paper that trapped the moisture inside. This moisture made the smooth skim coat crumble and needed to be scraped and replaced. I had to strip the window moldings because of extensive paint cracking and damage. There was a layer of metallic silver paint underneath it all. By the way, oil based and latex based paint will not react well to a shellac coating of days gone by.


The Christmas Wreath is decked out in bronze ribbon and pheasant feathers. The drapery rods were a splurge. The dark wood and bronze highlights are perfect for this masculine room. The drapery swag is created from a inexpensive brocade table cloth. Beads were added to the bottom of the swag to create that "Victorian" look. The chocolate brown maltalasse drapes are from IKEA. The wonderful thing about IKEA is their drapes are not hemmed, which is a huge plus for tall and very large windows.

Gentlemen's Parlor Before and After

Ceilings in homes this age were typically covered in wall paper. The design was often textures of soft color with gold metalic accents. The wallpaper was covered with many coats of paint, ending in a semi gloss off white. It took me a month of constant steaming, razor slicing and scraping to get down to the plaster. After plastering, priming and painting the ceiling, I spent many weeks on an eight foot ladder stenciling the ten foot six inch ceilings. I used a metallic pearl paint to create an affect of old metallic ceiling tiles. It was not easy, but I'm very happy with the results. Since we are on a budget, I searched far and wide to find a ceiling medallion. Online a metal medallion would normally cost in the $300. range. I discovered a metal clock at a local bargin store that only cost $25. I took the center clock out and fixed the metal frame to the ceiling. I am so happy with the results and the savings!

Gentlement's Parlor Before and After

The inside wall of the Gentlemen's Parlor. This door enters the center hallway. There was three layers of wallpaper in this room with very little plaster damage. The walls are painted a medium golden tan. The stencils are created with bronze and champagne gold metalic paint. I designed the rope pattern stencil and placed it where the picture rail molding would normally hang. The framed artwork are color prints of horse and buggy racing. I hung them in the same style as Victorian homes but with a modern twist. I used ribbon and hung them from curtain tiebacks.

Tuesday, December 4, 2012

Crazy Good Treat!
Melt one package of almond bark. Drizzle over a bag of Cheetos Puffs that has been placed in a large mixing bowl. Mix until fully coated. Place on wax sheet evenly to cool and harden. Makes an amazing sweet and salty treat.

Sunday, July 24, 2011

Gentlemen's Parlor

Well here it is a month later, and still no photos. I have actually just finished stripping all the paper, both walls and ceiling. What a job that was! It took me a few days to just wash the ceiling and walls! I finally have the first coat of primer on. I even spent a day stripping multiple layers of paint off the window trim. They were in such bad shape. Once stripped of the 100 yr layers of paint, they look wonderful!

Friday, June 24, 2011

Now, back to the Gentlemen's Parlor!

I took a little detour from the Gentlemen's Parlor to work on the pantry. I was in a need basis when I started that project. In the next month or so, I will be showing you the progress of the Gentlemen's Parlor!

The Pantry Final.

I am pleased at how the pantry turned out. I still have a few things that I would like to fit in there, but don't have the room. Scary to think that a 5 foot x 7 foot room isn't big enough to hold all our stuff!

Anway, it was an awesome project with very satisfactory results!


Pantry Right Side

Don't you love the slate blue wainscoating and the harvest gold flooring. Quite the color combination. Just imagine adding a fruit wallpaper border ontop. Needless to say, that isn't my style! But more than style, we needed a functioning pantry! All my small appliances are easily displayed. I love my new pantry!


Pantry Left Side

The first photo shows the only cupboard in the pantry. The plaster behind the cupboard was in very bad shape. I was happy to tear it out. The second photo is after I tore off the wainscoating. I covered the walls with some sheetrock and taped, mudded and painted. As you can see we got Chrome shelving and filled in nicely with my coupon loving wife. :D


Pantry Floor

Here is the before and after of the pantry floor. We used a self stick vinyl flooring to cover the 1970's Harvest Gold linoleum. This is only a temporary fix to the kitchen. We used this flooring before in our other house, and loved it so much we knew that it would work perfect for a temporary flooring until we could do a major remodel.


Pantry Ceiling

Here is the before and after of the pantry ceiling. I was surprised at the plastic and duck tape! Not very classy. And really an super easy fix.


Thursday, February 10, 2011

Gentlemen's Parlor Before

This is the inside wall. The door opens to the center hall. You can see the mauve and tan wallpaper undereath the ivory damask wallpaper. There is only two layers on these walls with wonderfully smooth plaster underneath.

Tuesday, December 28, 2010

Historial Decorating


I decided to decorate upstairs with cedar and evergreens. This is the mantel to the guest bedroom. This kind of decorating was very typical for Christmas during the turn of the century.

New Gas Stove


In January of this year I purchased a Vent Free Natural Gas Stove. It keeps the back of the house nice and warm.

Dining Room

Our dining room is pretty much the same as last year. I used all my red and gold decorations from the old house. I'm looking forward to renovating this room. I hope to get all downstairs rooms finished in 2011.

Gentlemen's Parlor


Peacock feathers were very popular during the turn of the century Victorians. Our gentlemen's parlor is brown and teal, a perfect match!

Ladies' Christmas Tea

We had 40 women at our house. What a joy it was to share our home with them.

Ladies' Christmas Tea


Our church celebrated their Annual Christmas Tea at our home. What an honor! In the center hallway they set up a little boutique. It was a great time!

Stair Decorations


I added the soft pink to the staircase. The greenery is draped with pearls and silver ribbon.

Christmas Tree Detail

We got some cherubs from a friend. Perfect for the Ladies Parlor.

Window Detail


Showing the detail for the windows. Two layers of ribbon, both gold and silver. Pearls are swagged in the greenery.

Pretty in Pink


Looking into the Ladies parlor at night. One of my favorite rooms in the house.

Front Door

We used our flower planters to hold our little Christmas Trees. We had one loan Gerbera Daisy that had to stay for a while.

Doing What I Love!

Here I am working on Christmas Decorations. I starting November 1st and worked on it until the first of December. I primed the whole front porch, and painted the floor before I did any decorating.

Heavy Snow

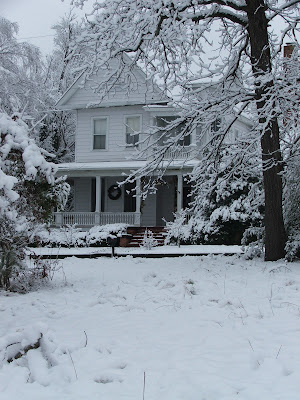
A beautiful heavy snow came in the beginning of 2010. I had to take at least a 100 pics.

Monday, December 20, 2010

Christmas Time

It has been a while since I've posted.
It's been a wonderful Christmas season! It started November 1st of this year, with decorating.
I had a goal of getting the house ready for some Holiday entertaining. I will share some stores and some photos when I get time!

Thursday, July 22, 2010

Kitchen

New flooring, new paint, removal of the fruit wallpaper border, new appliances, we are set for a while!
Thanks to friends, we have more cupboard and counter top space. Re-purpose of a bathroom vanity.
The built in got a few cosmetic changes. Now it's my baking center!


Kitchen


I've been working on a a few things in the kitchen. The 70's harvest gold tile, and the 90's slate blue wainscoating was a bit much for the eyes. This first photo shows the new and old tile.


The second photo is the inspiration for the kitchen. This paisley is black, brown, olive, tan and gray.

Tuesday, May 4, 2010

The Attic


Well one word could be used for our attic. Cavernous! It's huge up there, it must be close to 20 feet at the peek. I was up there to insulate. It's amazing that in 2010, I will be the first owner to insulate the main attic space. Now wonder we were freezing this winter and burning up in the summer.
I've got about 1/5 done. Will need to get more insulation before I take another journey up there.
The photo is the metal tag of the whole house attic fan. I got a closer look at it today, it's huge.
From what I've gathered on the internet, Hunter Fan and Ventilating Company is the oldest fan company in the states. It incorporated in 1901.
When I turn on the attic fan, you can feel the whole house pressurize before the air starts flowing. It creates such a vacuum that the drapes in the open window flap with the man created breeze. It cools down the house fast.

Monday, April 26, 2010

New Life for an Old House


New flowers were added to the front. We made a two foot flower bed on each side of the front walk, and four metal containers full of flowers. We also hung 4 wonderful ferns, giving the porch a wonderful southern charm.
Our front bushes got a haircut!


One of our clients, a landscaping company, traded out some work for their bookkeeping. It looks a little odd, but eventually the bushes will fill out. These front bushes have been so neglected it will take a while before they can be brought back to something that looks good.

Continued Scraping


Well we are still scraping . . . .